Learning Objectives
- Modify PowerPoint custom template presentation.
As a first step, Cameron first opens the PowerPoint application and creates a new presentation using the company sales campaign presentation template—RR Sales Campaign. He finds the exact template he wants and selects it by clicking on it.


This is the template for the sales report and the first change Cameron needs to make is to change the title and subtitle.
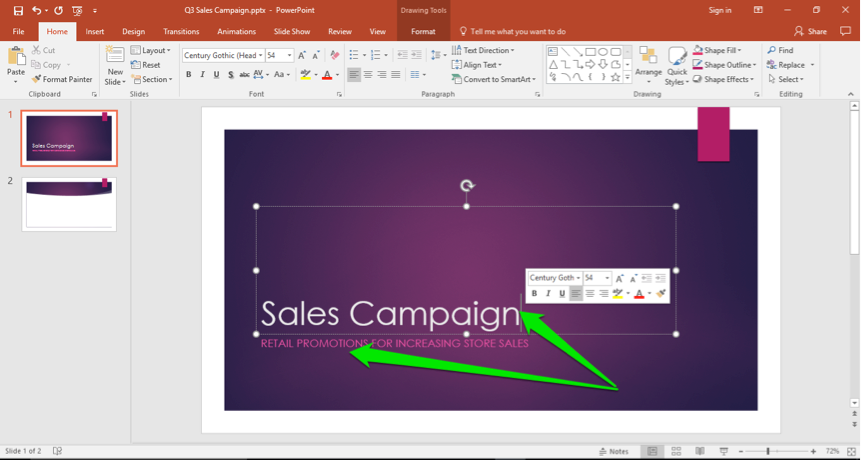
Cameron clicks on the title and subtitle areas and changes them. He titles the slide Q3 (for third quarter) Sales Campaign. He misspelled one of the words, so he right-clicks and selects the correct spelling for promotions.

Now that the first slide’s content is done, Cameron wants to change the presentation theme and customize this report more.
Customize Presentation Template
The first change Cameron makes is to change the theme of the template. He changes the theme by clicking on the Design Tab and selects the Theme changing the slides to a green color instead of purple.

New Slide
Next, Cameron adds in a new slide between the first and second slide. First, he places the cursor between the two slides. Next, he clicks on the Home tab and the New Slide button. This drops down a visual menu of the types of slides to choose from. He selects the 3 Picture Column slide.

With the new slide open, Cameron now begins to edit the title. He will then click on the image and text boxes to add content.

Cameron inserts pictures of the three stores.

- Select Picture Icon. Cameron clicks in a picture box and a file window appears.
- Select Picture File. He navigates to the folder with the pictures for the presentation and selects one by clicking once.
- Open/Insert Picture. He then selects the Open button to insert the picture into the presentation slide (he can also double-click on the picture and it is imported into the slide).
Now with two of the store pictures in place, Cameron needs to grab a photo of the third store from a Word document. These are the steps he takes to accomplish that action:

- Open Word. Cameron opens the Word document next to the PowerPoint presentation window.
- Find Picture. He scrolls through the document and finds the picture he needs and right-clicks on it.
- Copy Picture. He selects the Copy option in the pop-up menu and now navigates back to the PowerPoint presentation slide (he can also use the toggle keys Alt+Tab to get back to the PowerPoint window). Cameron could also use the Ctrl+C keys to copy the picture as well.
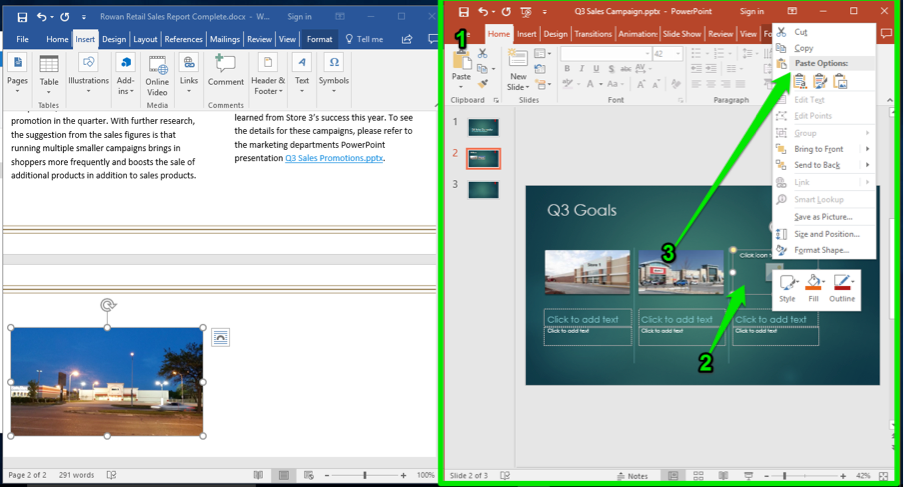
- Select PowerPoint. Cameron is back in the slide presentation and moves his cursor to the last picture box.
- Select Picture Location. Cameron navigates to the final picture area, then right-clicks on it. A menu appears.
- Paste Picture. He selects the Paste option and the picture is inserted into the presentation slide. Cameron could also use the Ctrl+V keys to paste the picture. The image will automatically be sized to fit the image box size.
Now Cameron clicks in the text boxes and types in the appropriate titles and goals for each store.


Cameron is now finished with this slide. He can now move on to the next slide, which he will use to show an Excel table.
Candela Citations
- Customized PowerPoint Templates. Authored by: Sherri Pendleton. Provided by: Lumen Learning. License: CC BY: Attribution