Learning Objectives
- Add, delete, and move columns and rows.
At times, you may find it necessary to change the number of rows or columns within your table, move columns or rows, or even alter the standard width of rows and columns. All these tasks are easy to accomplish within Excel, often with only a few clicks of your mouse.
Add Columns and Rows
Note for this section, the word column will be used throughout but the same steps can be used to add a row.
Method 1
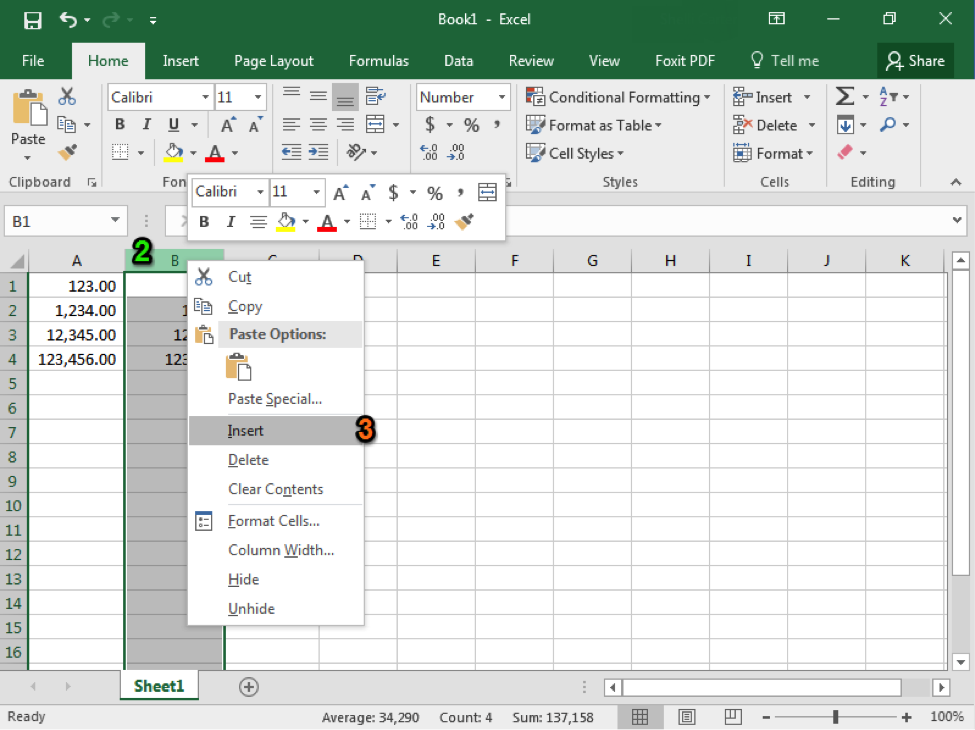
After you have entered several columns of data into a worksheet, you may realize you need to add another column in the middle of what you have already typed. The easiest way to add a column within an existing set of columns involves only two clicks of your mouse.
- Identify the area where you want to insert a new column.
- Right-click on the column to the immediate right of the area where you wish to add a column.
- From the menu select Insert.
- A new column will appear to the left of the column that you right-clicked.
Method 2
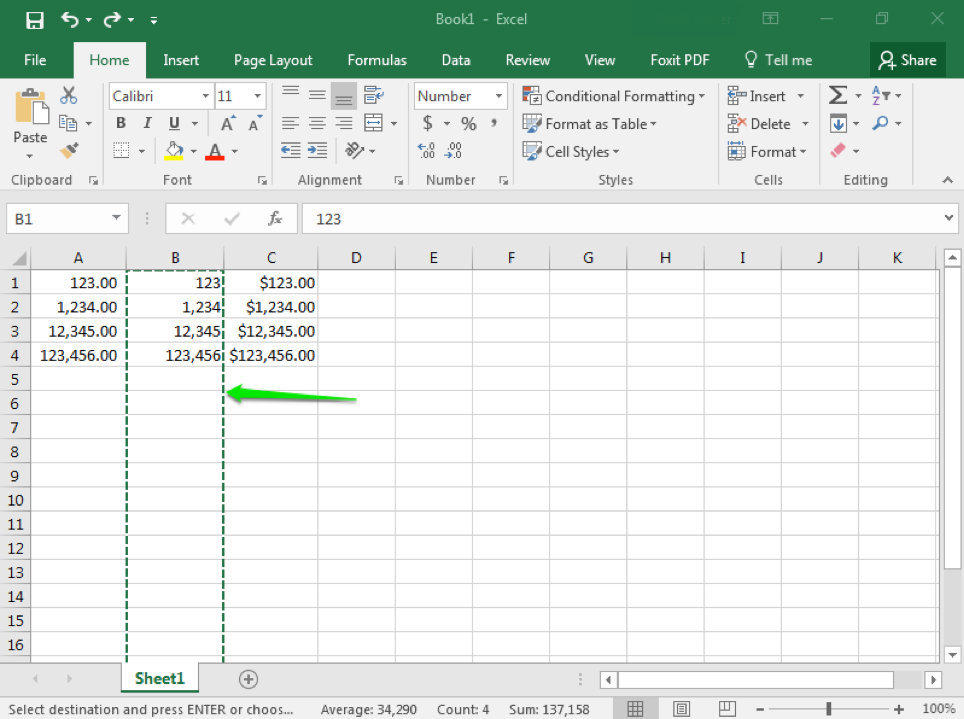
The same result can be achieved using the Insert button in the Cells group of the ribbon. The new column will be inserted to the left of the column you clicked on. In this screenshot, a column has been inserted.

Note that when you insert a new row, it will appear above the row you click on.
Practice Question
Delete Columns and Rows
Note for this section, the word column will be used throughout, but the same steps can be used to delete a row.
Method 1
After you have entered several columns of data into a worksheet, you may realize you need to remove one column. The easiest way to delete a column uses two clicks of your mouse.
- Right-click on the column you wish to delete.
- From the menu select Delete.

Method 2
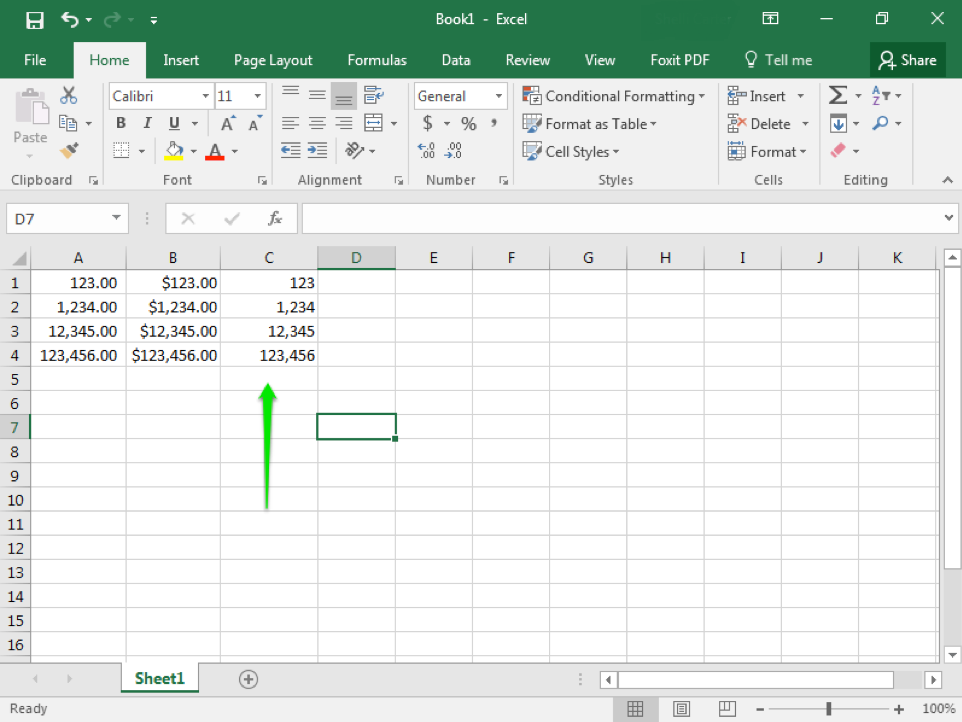
The same result can be achieved using the Delete button in the Cells group of the ribbon. The column currently selected will be the one deleted. In this screenshot the column has been deleted.

Move Columns and Rows
Note for this section, the word column will be used throughout, but the same steps can be used to move a row.
Method 1
After you have entered several columns of data into a worksheet, you may realize you need to move a column to a different location within the set. Once again, Excel makes it quite easy to move data around a worksheet.
- Right-click on the column you wish to move.
- From the pop-up window select Cut. The column you have selected should become outlined in a dashed border.
- Next, right-click on the column you wish to move your column to the LEFT of.
- A new dialog window will appear. Select Insert Cut Cells. The column you selected to move should then appear in this new location.
Method 2
The same result can be achieved using a combination of keyboard shortcuts and dialog windows.
- Right-click on the column you wish to move.
- Press Ctrl+X. The column you have selected should become outlined in a dashed border.
- Next, right-click on the column you wish to move your column to the LEFT of.
- A dialog window will appear. From it select Insert Cut Cells. The column you wish to move should then appear in the new location.
Practice Question
Candela Citations
- Rearranging Tables. Authored by: Shelli Carter. Provided by: Lumen Learning. License: CC BY: Attribution