Learning Objectives
- Create and modify text boxes.
Text boxes are containers for text that can be customized and moved around. They are useful for emphasizing or decorating text.

Some examples of text boxes.
To add a textbox, go to Insert>Text>Text Box. There are a few pre-created Built-in options to choose from. Click one of the Built-ins to add it to the document. You can also draw your own by choosing Draw Text Box, then clicking and dragging where you want the text box to be.
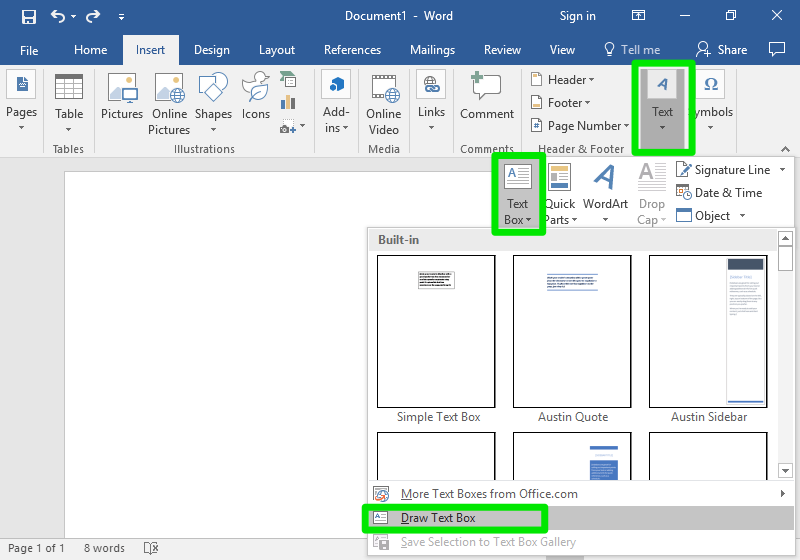
Text Box menu

Drawing a text box
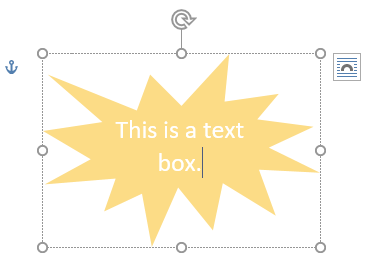
Once created, you can type in the text box, change the size of the text box, move the text box around, and even rotate the text box.

- Anchor point. The anchor is the point at which the text box intertwines with the rest of the document. Click the anchor icon to select the entire text box.
- Rotation control. Click the circular arrow and then drag to rotate the text box.
- Wrap text. This controls how content in the rest of the document interacts with the text box. Text can go around the text box, in front of the text box, or skip over the text box. Text wrap is covered in more detail in the Images section.
- Resize points. The white dots on the border of the text box control the width and height of the text box. Click and drag any of the white dots to move that side or corner.
To move the text box, hover your cursor near the edges of the box. When you see four arrows behind the cursor, you can click and drag the box wherever you want it.

Formatting Text Boxes
When you create a text box, a new tab will appear on the ribbon called Format. There are a lot of different tools in the Format tab, some of which may look familiar.

1. Shapes
The Shapes group (at the far left) allows you to change the shape of the text box. Click the Change Shape button in the Shapes group and then Change Shape to see a dropdown menu with many shape options. Click an option to apply it to the text box.

You can also create a custom shape using the Edit Points option (just below Change Shape). The points of the text box will be outlined. Click and drag the black dots to alter the shape of the text box.
 |
 |
2. Styles
Click the dropdown arrow to open a dropdown menu with a variety of styles for your text box. Some styles may have a gray checkered pattern. The gray checkered pattern indicates transparency. Hover over each effect to preview the results; click to apply the effect.


3. Text
The Text group of the Format tab gives you additional control of the text in the text box.
Text Direction
By default, text runs horizontal in the text box. But you can choose to rotate the text so that it runs vertically by choosing Rotate all text 90° or Rotate all text 270°.


Text Alignment
Text alignment of text boxes works much like text alignment in the main document. Instead of the margin or border of the page, the text aligns with the border of the text box.

Create Link
Create Link lets you create a link between two or more text boxes so that text can flow, or continue, from one text box to the next.

Select a text box, then click Create Link. The cursor will change into a paint bucket. Click on the second text box to link them. Once linked, anything typed in the first text box will flow over to the second. (Note that the second text box must be empty before you link to it.)

Practice Question
4. Arrange
The arrange option controls the order of text boxes and other elements on a page. Although a Word document is a two-dimensional file, arranging elements requires a bit of three-dimensional thinking.
The main document, where the main text is, is the bottom layer of the document. When you create a text box, the text box is on top of the rest of the document. Adding another text box puts the new text box on top of the first one.

With the Arrange option, the text box order can be rearranged.

- Bring forward brings the text box forward one spot.
- Send backward sends the text box backward one spot.
These options are also available when right-clicking on a text box:

- Bring to front brings the text box to the very front so that it is on top of everything else.
- Send to Back sends the text box to the very back so that everything else is on top of it.
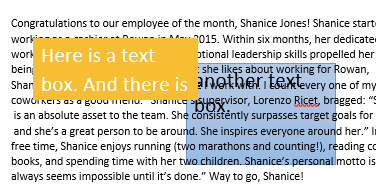
The yellow text box has been brought to the front, while the blue text box has been sent to the back.
Shapes
Sometimes you may want just a shape with no text, or you may want to figure out what shape you want a text box to be before you add text.
To insert a shape, go to Insert>Shape and select a shape from the menu.
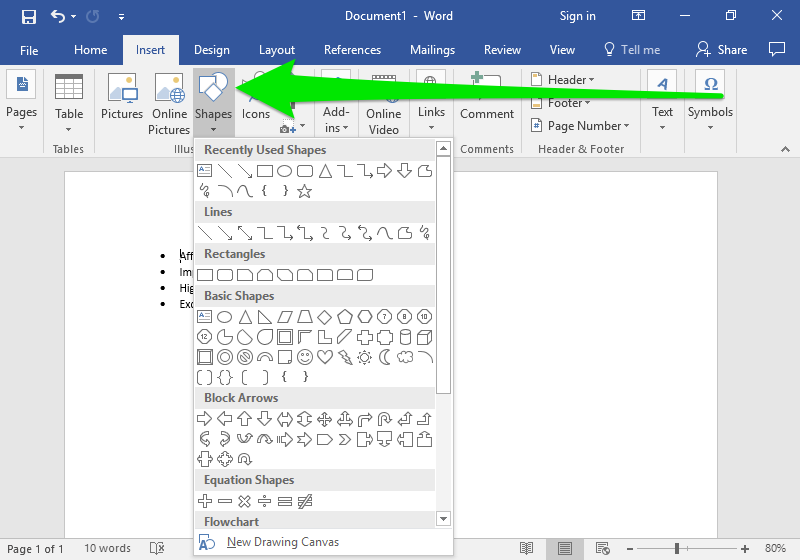
Once you select a shape, click and drag to draw the shape. You can then apply a text wrap, rotate the shape, or send the shape in front of or behind text.

Click and drag |

Square text wrap |
You can change the color or add other effects to the shape from the Format tab, which appears when you click on the shape.

If you decide you do want to add text to the shape, double-click on the shape and start typing to make the shape a text box.
Candela Citations
- Cursor-Move. Authored by: iconsmind.com, GB. Located at: https://thenounproject.com/term/cursor-move/72154/. License: CC BY: Attribution
- Text Boxes. Authored by: Lumen Learning. License: CC BY: Attribution