This assignment can be found in Google Docs: Business Communication Skills for Managers Assignment: Use Mail Merge
To make your own copy to edit:
- If you want a Google Doc: in the file menu of the open document, click “Make a copy.” This will give you your own Google Doc to work from.
- If you want a PDF or Word file: in the file menu of the open document, click “Download” and select the file type you would like to have (note: depending on the file type you select, the formatting could get jumbled).
For this assignment, you will create a Word document that is mail merged with an Excel customer contact table. Mail Merge can be used to create bulk labels, letters, envelopes, and emails. You will be creating letters to send with the newsletter you previously edited. Follow the directions below, then submit your assignment. If you get stuck on a step, review this module and ask your classmates for help in the discussion forum.
You have been tasked with mailing the newsletter you previously created to customers of Rowan Retail. In order to accomplish this task, you need to merge the customer contact information in the Excel file with a Word document in order to make mailing labels. Follow these steps to accomplish the task.
- The first step is to download the customer contact Excel file and save it to the Rowan folder on your desktop.
- Open Word and create a new document by clicking on the Blank document option in the window.
- Save the document by using Save As and rename the document to BA132_LastName_MailMerge.docx, replacing “LastName” with your own last name. (Example: BA132_Hywater_MailMerge)
- Select the Mailings tab then the Start Mail Merge button and select Step-by-Step Mail Merge Wizard.

- In the Mail Merge menu, click the Next: Starting document link.
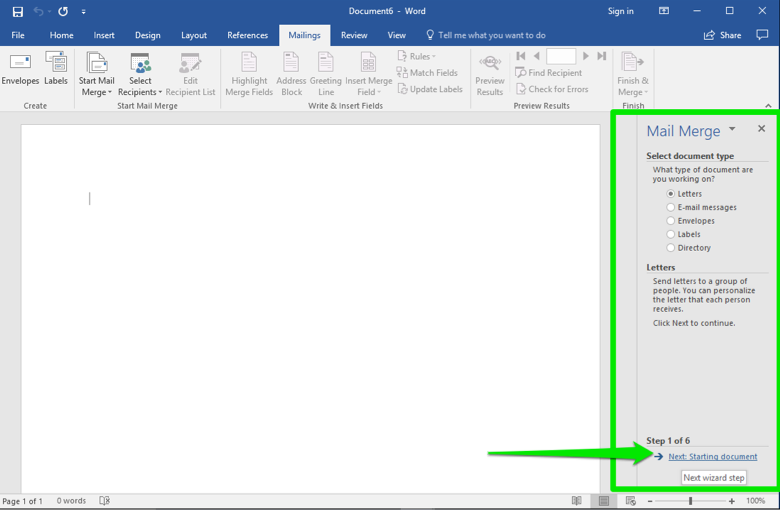
- You will be creating letters for the contacts who will receive the newsletter, so leave the document type in Letters and click the Next: Select recipients link.
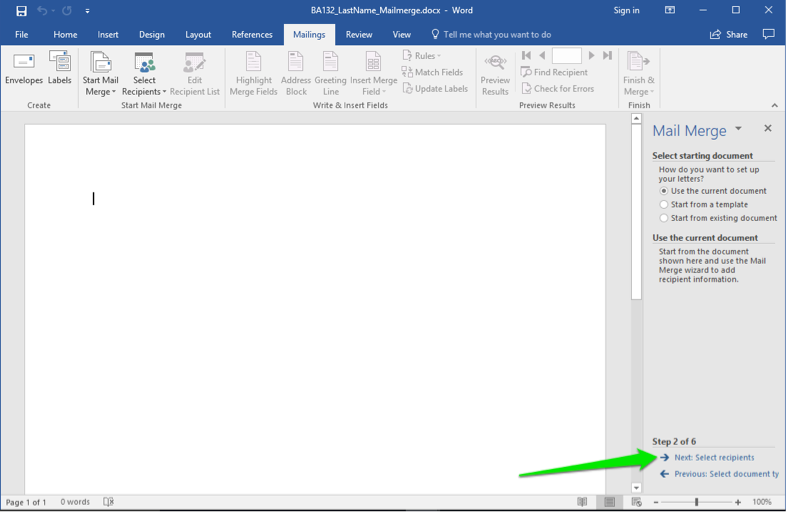
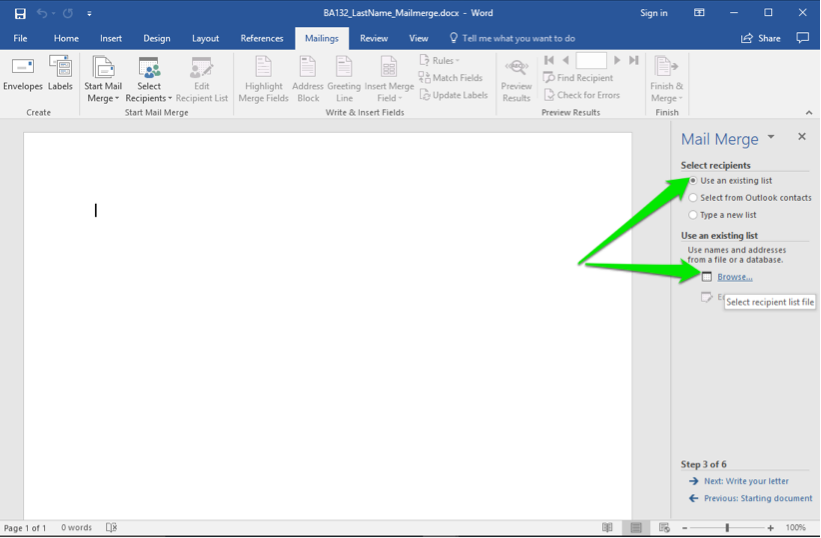
- You already have a file with a contact list. Leave the selection Use an existing list selected and click on the Browse link. This will open up a dialog box for your computer.
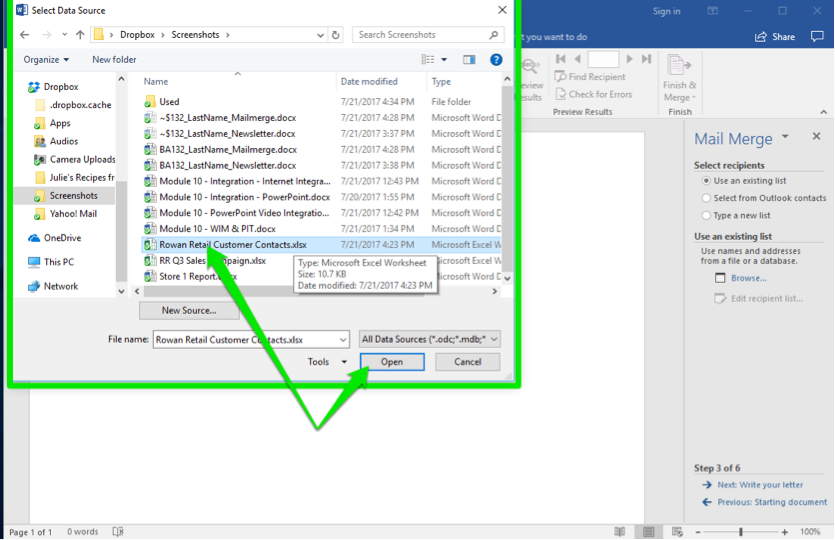
- Select the correct folder and scroll through the files until you find the Rowan Retail Customer Contacts.xlsx file. Either double-click on the file or select it and click the Open button.
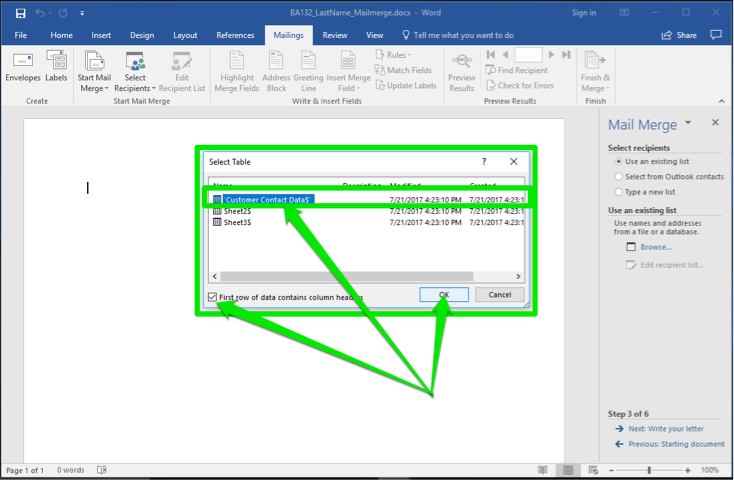
- A different dialog window will open that allows you to choose the different tabs in the Excel file. The Customer Contact Data$ is the one you want. Either double-click on the file or select it and click the Open button. Note: Leave the box checked since your data file’s first row is a header row.
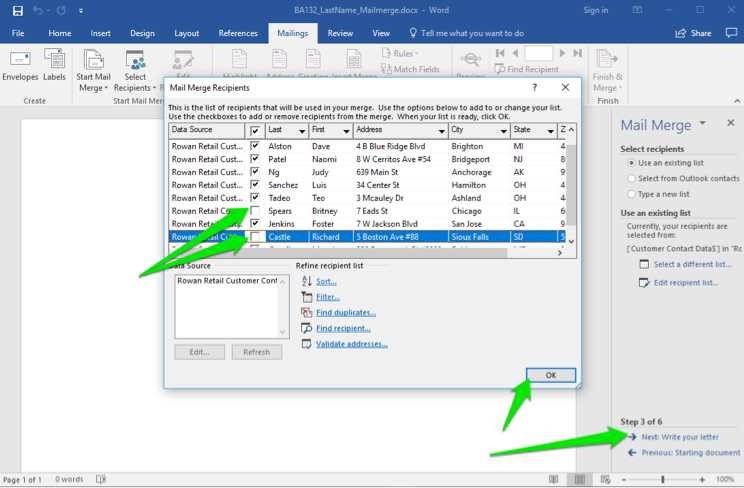
- After you have clicked the OK button, a final dialog box appears. It shows all of the contacts in the file. Find Richard Castle and Britney Spears and uncheck their boxes. They do not need a newsletter. Now click the OK button and then the Next: Write your letter link.
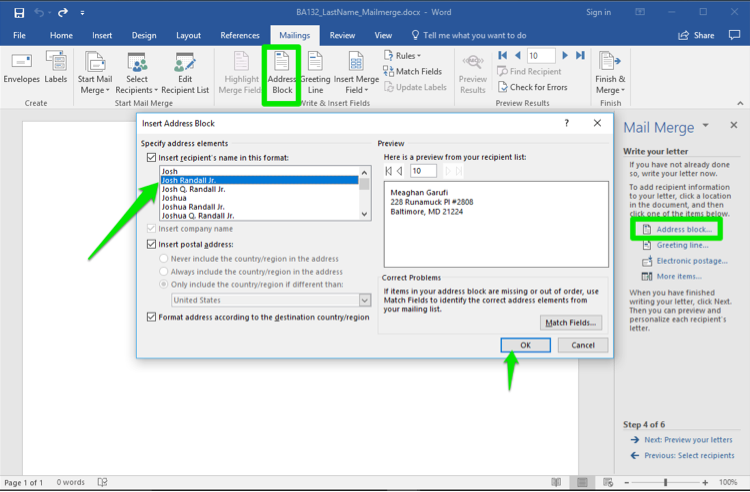
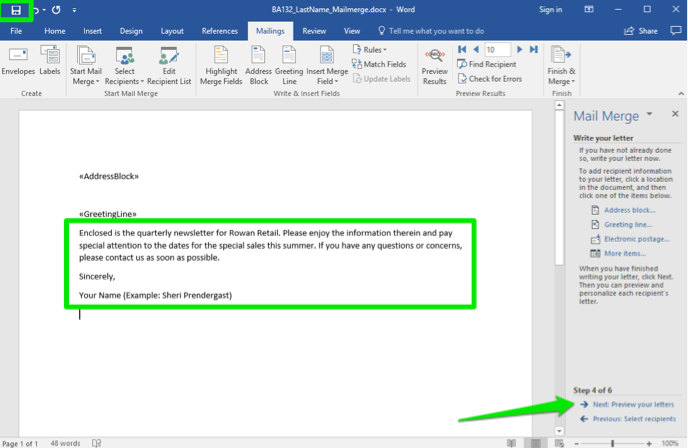
- Now begin to compose the letter by first placing your cursor in the document page where you want the address. Click the Address Block option from the wizard or the ribbon button, select the naming style, then click OK.
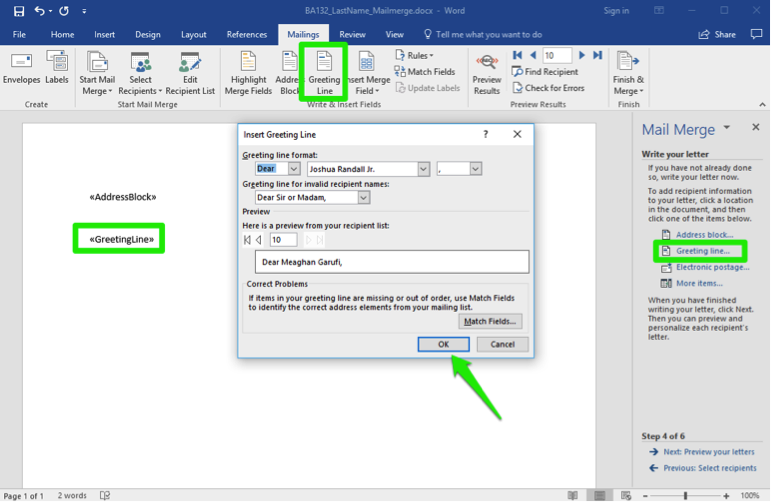
- Next, place the cursor where you would like the greeting to be in the letter. Select the Greeting line from the wizard or the ribbon button, decide the style of greeting, and click the OK button.
- Paste the following text to serve as the body of your letter.
Enclosed is the quarterly newsletter for Rowan Retail. Please enjoy the information therein and pay special attention to the dates for the special sales this summer. If you have any questions or concerns, please contact us as soon as possible.
- Close the letter with “Sincerely” and then your name. Save your work, then click Next: Preview your letters.
- Scroll through the letters by clicking on the arrows. You should be missing Britney Spears and Richard Castle in the recipients. Now click on Next: Complete the merge.
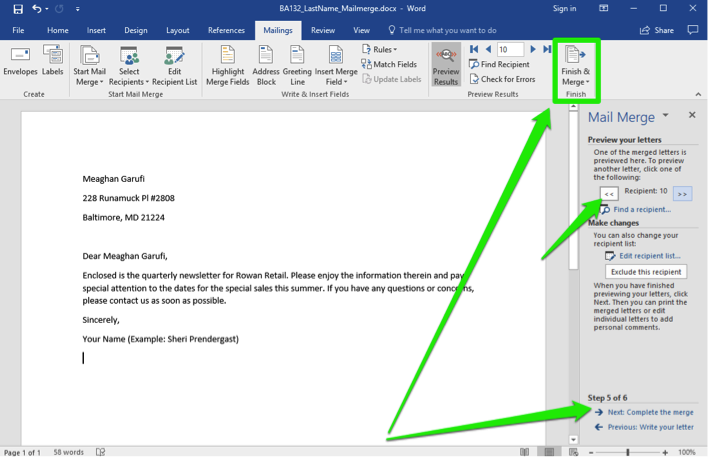
- Once you have completed the merge, you can click on Edit individual letters… if you need to make any changes to just a few letters.

- For this assignment, you don’t need to make any edits to individual letters. You can then continue to the final step, Complete the merge.
- Make sure All records are selected and then click OK.

- Your merge mail file is now complete! Save your file once more, this time as a PDF (use the .pdf file extension), and submit the PDF in your course online.
Candela Citations
- Assignment: Use Mail Merge. Authored by: Sherri Pendleton. Provided by: Lumen Learning. License: CC BY: Attribution
