Learning Outcomes
- Create appointments and meetings
Creating Appointments and Meetings
Creating an appointment puts an event on your calendar, but does not invite anyone else. Creating a meeting lets you invite others to join an event you are creating.
To create a meeting when you are in the Outlook calendar, select New Meeting on the ribbon. If you are in your Outlook email, you can also create a new meeting directly from there by clicking on New Items>Meeting on the ribbon.
If you select New Appointment, but later decide you want to make it a meeting and invite someone, you can select Invite Attendees on the Attendees area on the ribbon and change it to a meeting. Likewise, if you select New Meeting but later decide you want to make it an appointment and not invite others, you can select Cancel Invitation on the Attendees area on the ribbon.
When you select New Meeting or New Appointment, it opens in a new window, just like creating a new email.
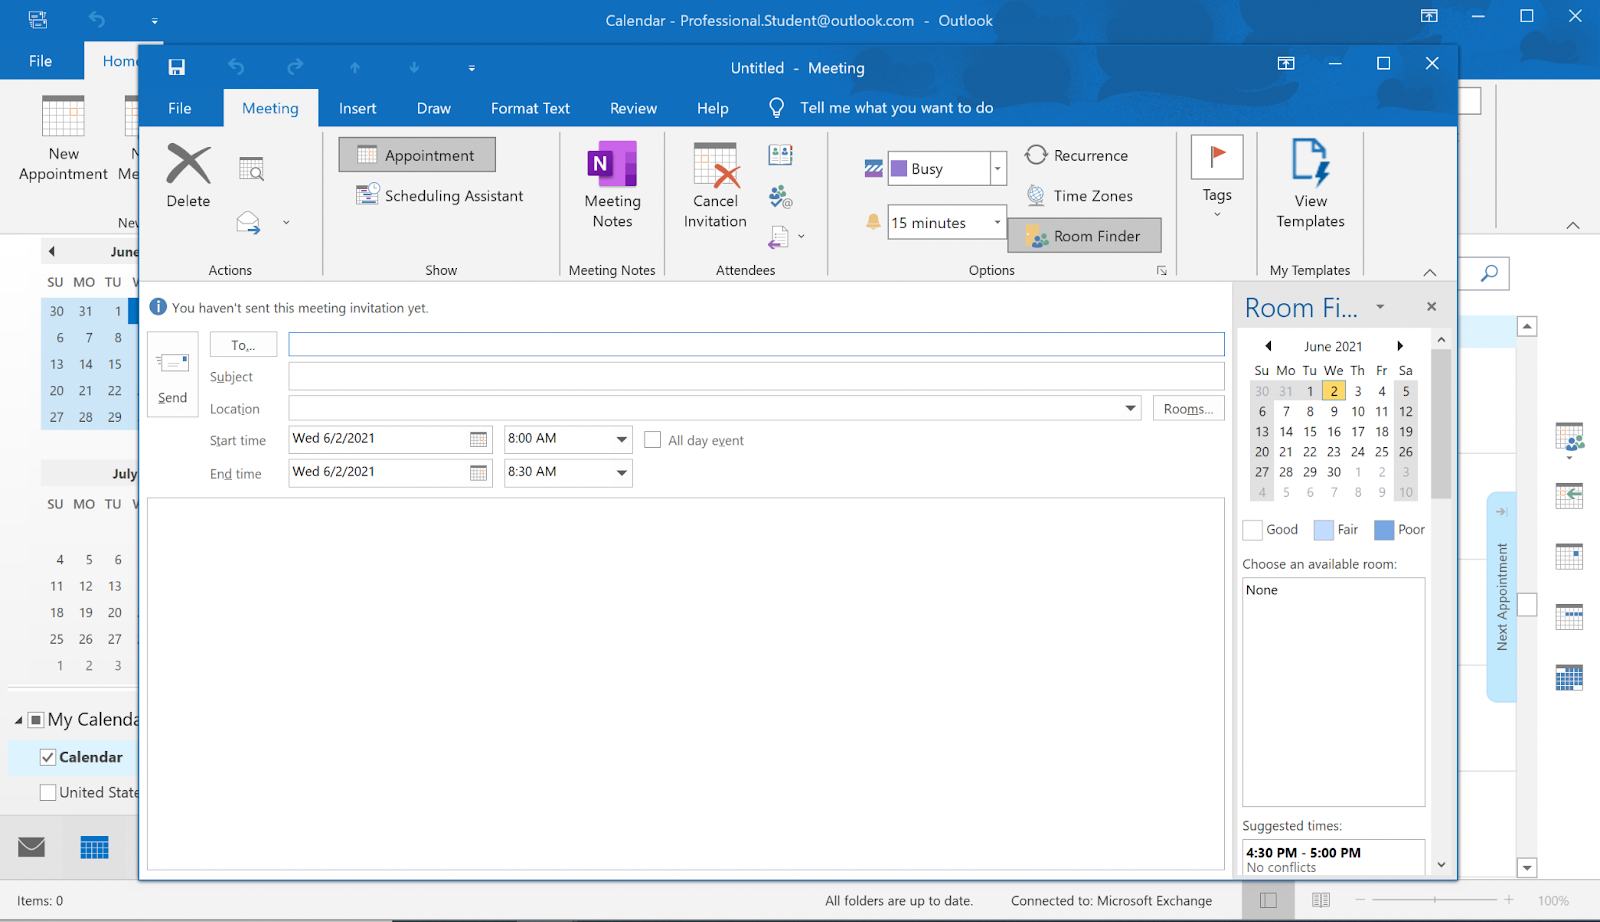
Create the meeting invitation by completing the following fields:
- To. Type the names or email addresses of the attendees you wish to invite, or click on the To button to go to your Address Book to select contacts.
- Subject. Similar to an email, type a meaningful subject line so the attendees know the purpose of the meeting.
- Location. Enter the location. If you are using a school or business email address, you may be able to book a room at your school or office by clicking Rooms and using Room Finder. If it is a virtual meeting, you may want to write something like “Zoom – See link below” and then include the full link to join the meeting in the meeting details.
- Start time and End time. Enter the date and time for the meeting to start and end.
- Meeting details. Use the meeting details area to send additional details about the purpose, agenda, or format of the meeting.
When you send a meeting invitation, you have the option to include attendees as “required” or “optional”. If you enter attendees in the To field, they will be invited as a required attendee by default. To invite someone as an optional attendee, click on the To button, then enter the attendee in the Optional field rather than the Required field. When you click OK, you will see all attendees in the To field. You can click on the To button anytime to see which attendees are required and which are optional.
You can attach files to a meeting similar to how you attach files to an email by clicking Insert>Attach File.
Make a Recurring Event
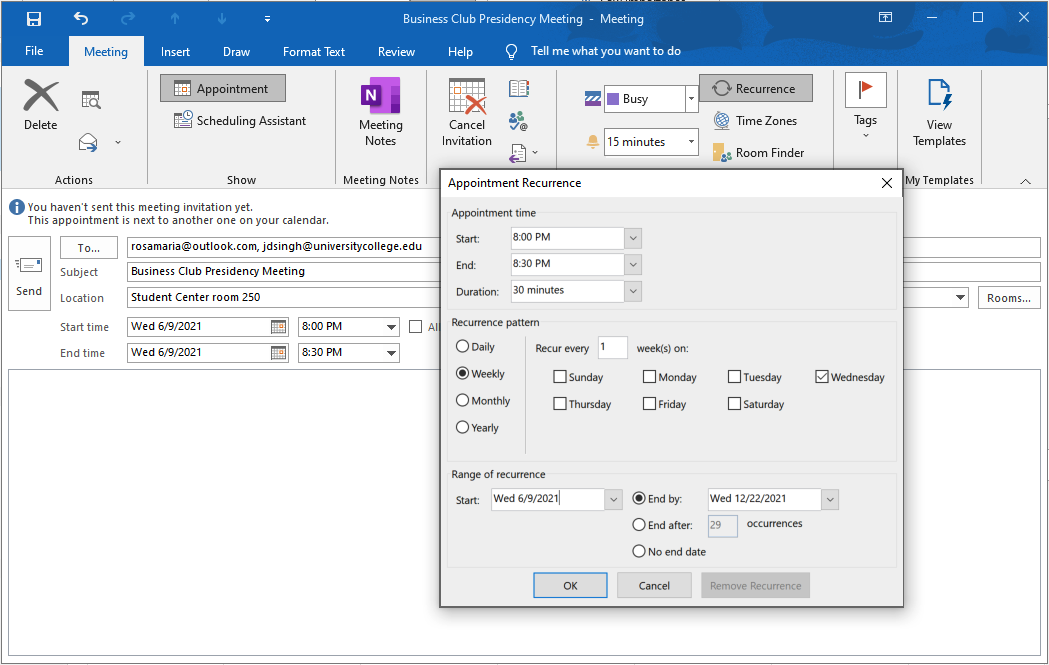
You can make a meeting or appointment recurring. This can be very useful for any events to repeat regularly.
To make an event recurring, click on Recurrence on the Meeting tab. You will then have options to select what days the meeting occurs, how frequently it is scheduled, and for how long it recurs.
After you have created a recurring meeting, when you try to open it (by double clicking on the event on your calendar), you will be asked to select whether you want to open just the one event you clicked on, or to open the entire series.
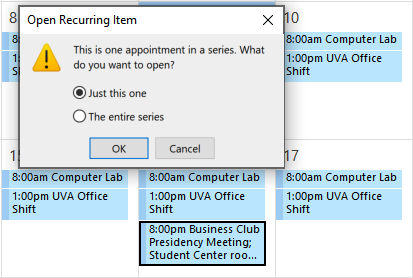
If you open the entire series, then you can change the settings of the recurring events. If you open just this one, then you can change the settings of that one occurrence, including changing the date/time or cancelling the event.
Add a Person to an Existing Meeting
You can add additional attendees to an existing meeting. If you are the meeting owner, double click on the meeting to open it. Add the additional attendee in the To field and click Send. You can also delete attendees if you like. After you click Send, you will then be prompted to select whether to send updates only to added or deleted attendees, or to send updates to all attendees.
If you are not the meeting owner, double click the meeting to open it. On the Meeting tab of the ribbon, click on the forward icon and then click on Forward. Note that the meeting owner will get a notification when the meeting has been forwarded to someone else.

Receiving and responding to meeting invitations
You will get an email whenever you receive a meeting invite. Depending on the email service used by the sender, the body of the email may appear differently, but the email will have a new menu of calendar options at the top. You can use these options to accept or decline invitations, as well as to reply as tentative or propose a new time for the meeting. You can also reply with a typical email reply.

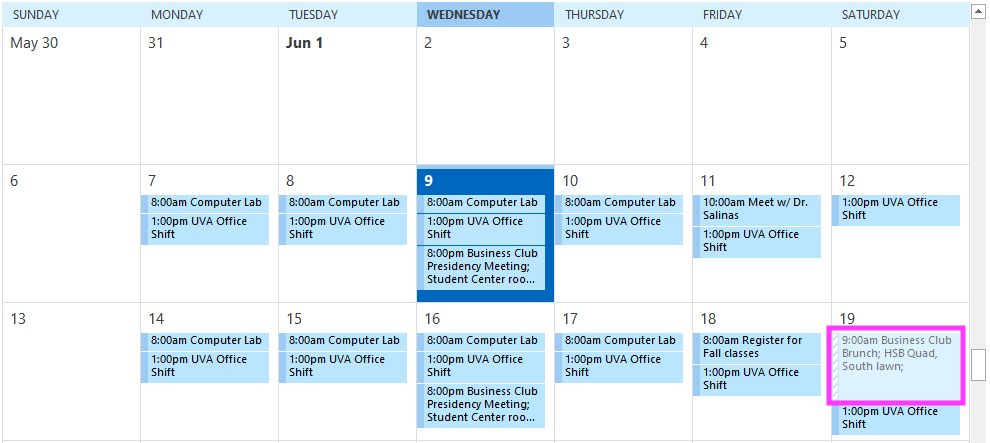
If you have not yet responded to a meeting invitation, it will appear on your calendar in light blue with a hashed left side. In the calendar view, you can double click the event and then select from the same options to accept or decline the invitation.
When you choose accept, tentative, or decline, you will see a menu of three options appear.
- Edit the Response before Sending. This lets you type a message to the meeting owner to send along with notification of your response.
- Send the Response Now. This sends the meeting owner an email notification of whether you’ve accepted, accepted as tentative, or declined the invitation.
- Do Not Send a Response. This updates the meeting on your calendar, but does not send the meeting owner a notification of your response.

If there are multiple attendees and you want to see how others have responded to the invitation, you can open the meeting and click on Scheduling Finder to see others’ responses. You can do this whether you are the meeting organizer or an attendee.
If you previously declined a meeting and want to change your response, you can find the original meeting invitation in the Deleted Items folder. Once you find the meeting invitation, you can change your response to Accept or Tentative. If your Deleted Items folder has been emptied, you will have to ask the meeting organizer to forward you the original invitation.
PRACTICE QUESTION
Candela Citations
- Creating Appointments and Meetings. Authored by: Lumen Learning. License: CC BY: Attribution
