Learning Outcomes
- Create and format numbered and bulleted lists.
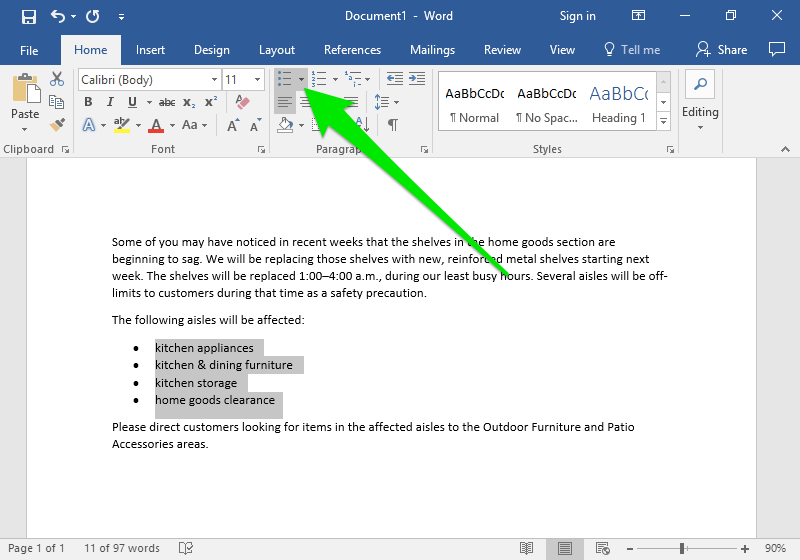
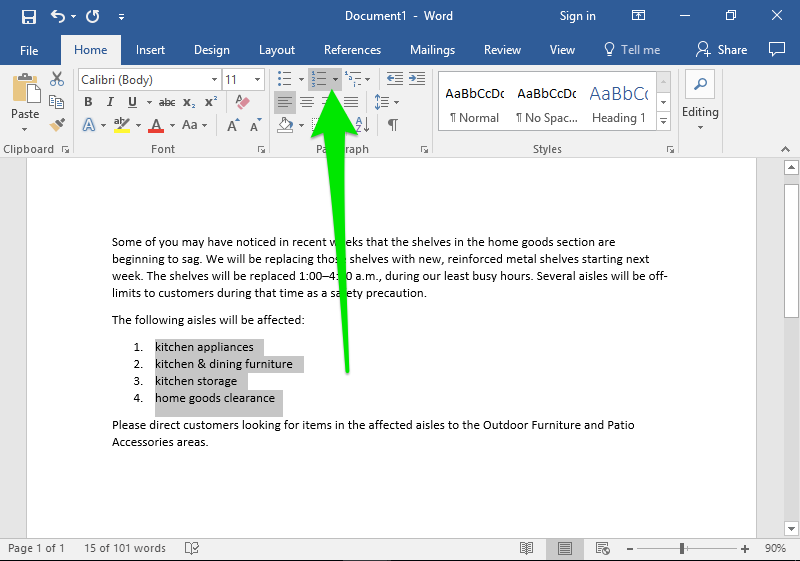
There are two kinds of lists: bulleted and numbered lists. The buttons for both are found in the Paragraph group, as seen in the screenshot below. (Bulleted to the left, numbered to the right)

To start, select the text you want to change, then click either the bulleted or numbered list button. Alternatively, you can click the bulleted or numbered list button and then start typing.

Bulleted list

Numbered list
If you click and hold either of the list buttons, more options will appear.
Bulleted Options

In the bulleted options, you can select a new bullet from the bullet library. At the bottom, the Define New Bullet… option will let you pick any symbol or even a picture from your computer to be the bullets.
 |
 |
 |
Numbered Options

In the numbered options, you can choose what kind of numbering to give your numbered list. For example, you can use letters or Roman numerals. At the bottom, the Define New Number Format… opens a dialog box that will let you further customize how your numbered lists appear.
 |
 |
 |
Practice Question
List Levels
The quickest way to increase the list level of a single line is to hit the Tab key once. To increase and decrease multiple lines, select the text you want to change, then click the increase or decrease list level button as shown in the screenshot below.

You can also use the Change List Level option at the bottom of the numbered options.
To customize how the list levels look, go to the list level options as shown in the screenshot below.


You can choose one of the different multilevel list styles available in the menu, or you can customize your own by choosing Define New List Style… or Define New Multilevel List…
You can also change the list level of a line here by selecting Change List Level, then selecting a new level in the menu as pictured above.
Review
Candela Citations
- Word: Lists. Authored by: GCFLearnFree.org. Located at: https://youtu.be/tyXahko-tX8. License: All Rights Reserved. License Terms: Standard YouTube License
- Lists. Authored by: Lumen Learning. License: CC BY: Attribution
