Learning Outcomes
- Take a screenshot.
You can take a snip, or a screenshot that is of only part of the screen, with the Snipping Tool, or you can take a screenshot of the entire screen with the Print Screen button.
Snipping Tool
In Windows 10, you can open the snipping tool by going to Start>Windows Accessories>Snipping Tool, or by opening the Start menu and typing “Snipping Tool.” In Windows 7, you can open the snipping tool by going to Start>All Programs>Accessories>Snipping Tool. Older versions of Windows might have the snipping tool in a similar location; however they may not have the snipping tool at all, in which case the Print Screen button should be used to take screenshots.

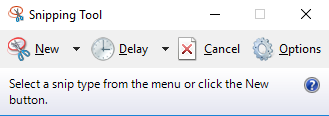
The Windows 10 snipping tool
The snipping tool will open a small window with New, Cancel, and Options buttons. You can take rectangular, freeform, window, or full-screen snapshots. Windows 10’s snipping tool also has a Delay button, which can be helpful for capturing menus or dialog boxes.
Take a Rectangular Screenshot with the Snipping Tool
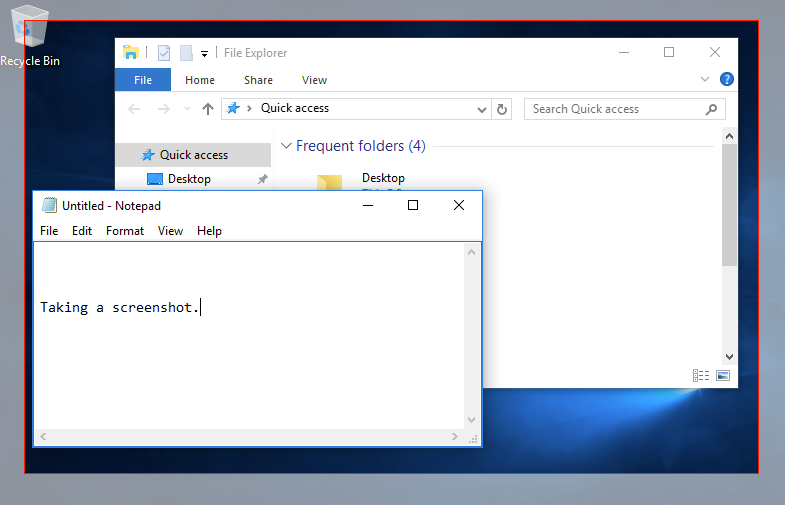
Click New, then click and drag over the portion of the screen you want to screenshot. The snipping tool window will disappear as soon as you start clicking and dragging to take your screenshot. (If you hit New by mistake you can cancel the snip by clicking the cancel button before you click and drag.)
Once you’ve captured the screenshot, the snipping tool window will reappear with some new options available.

Save. Copy. Send to. Pen. Highlighter. Eraser.
- Save. Saves the current screenshot. If you do not save the screenshot, it will be automatically deleted when you take a new screenshot or close the snipping tool.
- Copy. Copies the current screenshot so you can paste it into an image editing program, like Paint, GIMP, or Photoshop.
- Send to. Opens Microsoft Outlook so you can email the screenshot to someone. Clicking the dropdown arrow to the right of the button allows you to choose whether to send the screenshot in the email or as an attachment.
- Pen. Allows you to draw on and mark the screenshot. Clicking the dropdown arrow to the right of the button allows you to change the color of the pen.
- Highlighter. Allows you to highlight anything on the screenshot.
- Eraser. Erases the effects of the pen and highlighter tools. (Note that Ctrl+Z does not work on the pen or highlighter tool; you must use the eraser to correct mistakes.)
Don’t forget to save your screenshot!
Other Screenshots with the Snipping Tool
By default, the snipping tool is set to take rectangular screenshots. You can change this by clicking the dropdown arrow to the right of the New button and choosing between free-form, rectangular, window, and full-screen snips.

Free-form snip: Draw an irregularly shaped screenshot. |

Window snip: Pick a window to take a screenshot of it |

Screen snip: Take a screenshot of the entire screen. |
Timed Screenshots with the Snipping Tool
Some things, such as dialog menus, are hard to take a screenshot of. Timed screenshots are especially useful for taking screenshots of these dialog menus or other click-triggered items, since the delay gives you enough time to open those items.

To take a timed screenshot, click the arrow to the right of the Delay button, then select how many seconds you want the snipping tool to wait before taking the screenshot. The default setting is 0.
After setting the number of seconds to delay, click New to start the timer. For example, if you selected a 5-second delay, once you click the New button you have five seconds to get your screen ready for a screenshot. At the five-second mark, the screen will freeze in place and the snipping tool will reappear. You can then take a screenshot using whichever shape (free-form, rectangular, window, full-screen) you previously selected with the New dropdown menu.
Getting the timing right can be tricky, but don’t worry—you can always try again by taking a new screenshot. Only the screenshots you save using the Save button are kept.
Practice Question
NOTE
If you are running Windows 8 or older and do not have the Delay button, you can still take a screenshot of dialog menus or click-triggered items with the Print Screen button.
Print Screen
As previously mentioned in Keyboard Shortcuts, another way to take a screenshot is to use the Print Screen button (Prt Scn). Pressing just the Print Screen button will take a picture of everything visible on your computer screen; Pressing Prt Scn+Alt will take a picture of the currently active window (the window you last interacted with). Screenshots taken with the print screen button must be pasted (with Ctrl+V) into an image editing software such as Paint, GIMP, or Photoshop.
Screenshots on a Mac
On Mac computers, pushing Command+Shift+3 will take a full-screen screenshot. Pushing Command+Shift+4 then clicking and dragging will create a rectangular screenshot. Hitting Command+Shift+4+Space and then clicking a window will create a window screenshot. Mac users can also use the Grab tool, found in the Applications/Utilities folder. By default, Mac screenshots are saved to the desktop.
Candela Citations
- Snips and Screenshots. Authored by: Lumen Learning. License: CC BY: Attribution


