Adding New Images
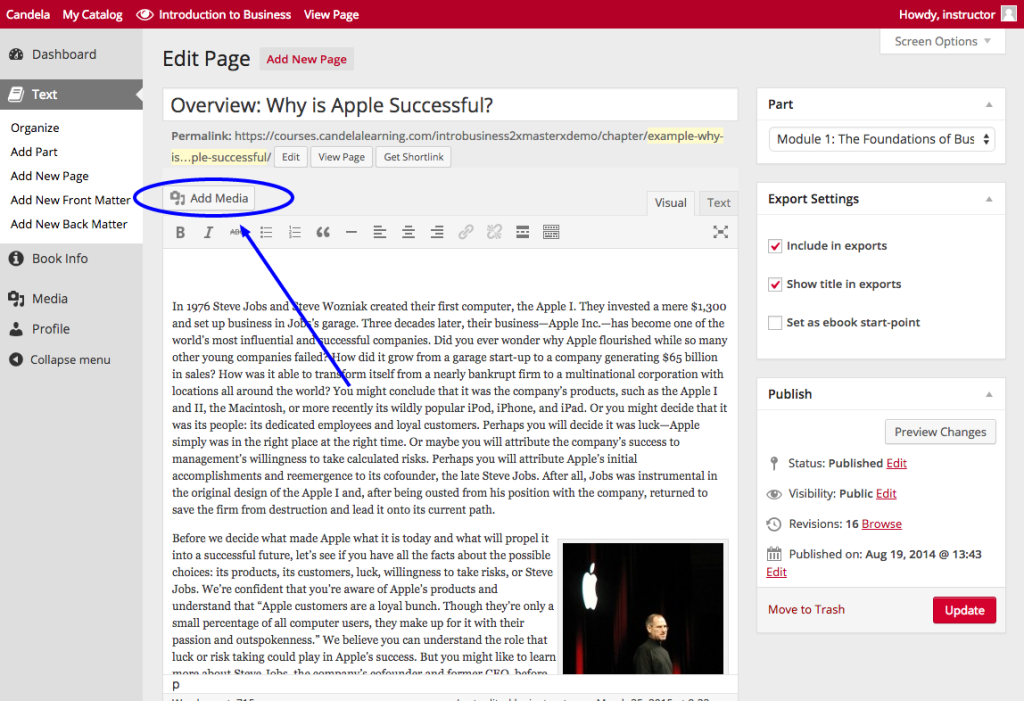
To add new images, or edit existing ones, use the “Add Media” button at the top of a page’s edit screen.
The next screen allows you to drag & drop an image from your computer desktop, or search for a file on your computer to upload.
Once your desired image has been added, you can title the image, include a caption (optional), add Alt Text (for screen readers), and include a description if desired.
- The Alignment pull-down menu lets you left-align, center, or right-align the image with the surrounding text.
- The Link To pull-down menu lets you determine how users access the image file. (We recommend using media files, aka image imports, rather than linking to external urls).
- Size lets you customize the pixel size in the book page. The default “medium” is fine for most pictures. For pictures with fine detail or text, select “large.”
- For very large images, or text-heavy images, we recommend selecting the size “Thumbnail.” That way a user can click on it to enlarge the full image. See example below.
Editing Existing Images
Have you placed an image, but aren’t quite happy with how it looks? There are some shortcuts to editing it.
In the edit screen of a page, click your mouse on the image. Two buttons will appear at the top left corner: one pencil (for editing) and one X (for deleting).
Clicking on the Pencil Icon will take you to a screen like this:
…where you can alter the image to meet your needs.
Clicking the “X” button, to delete the image, removes the image from the page you’re editing. However, it will still be available in your course’s Media Library, so you can include it again later if you want.
To access your Media Library, click “Add Media” from the edit screen of any page. Next to “Upload Files” is a tab called “Media Library” which will let you see all of the existing images in the course.
When one image is selected, like the image of Warren Buffet in this example, information about that image appears on the right column. From here, you can edit the image similarly to importing a new one.


