Learning Outcomes
- Create a notebook, sections, and pages in OneNote
OneNote is a digital notebook that allows you to gather and organize information in notes that will be automatically saved and synced while you work. Because they are synced and stored in the cloud, your notes can be accessed from any device with an internet connection. A note can be typed on any device or handwritten if you have a tablet and stylus. You can also share your OneNote notebooks with others.
OneNote can either be accessed via a web browser or a desktop application. Once again, this module focuses on the desktop application.
ONENOTE on a Mac
Microsoft OneNote is also available for download on a Mac from the App Store. Using OneNote on a Mac will look and function very similarly to how it operates on a PC.
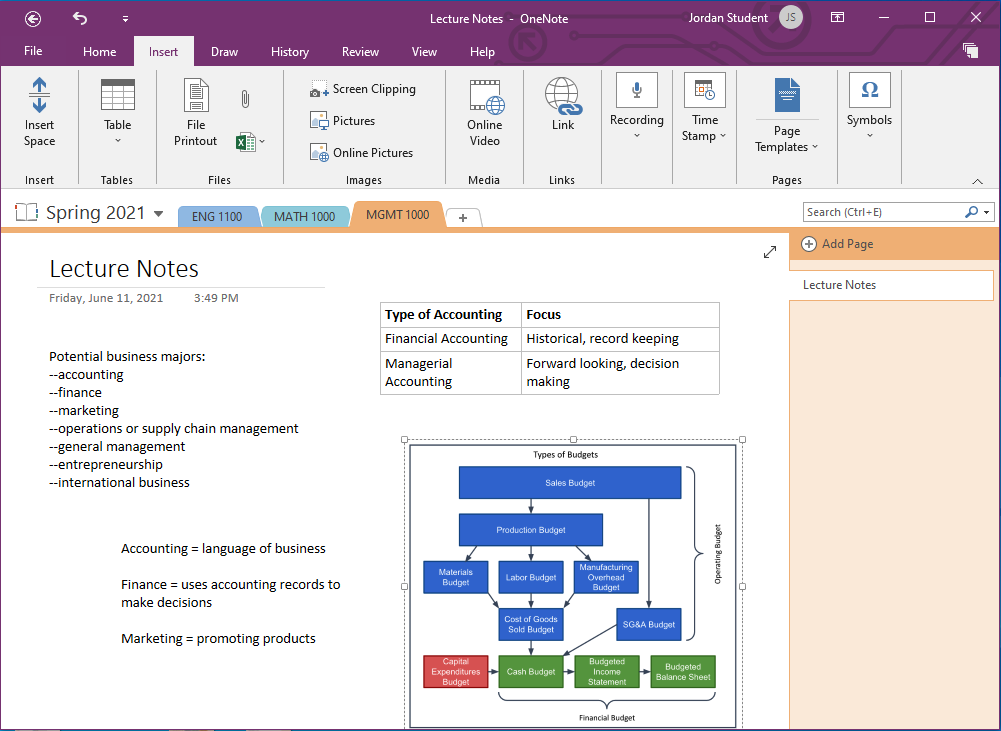
OneNote notebooks are organized in three levels–notebooks, sections, and pages.

- Notebook. Click on the arrow next to the notebook name to select a different notebook from the dropdown menu.
- Section tabs. Within a notebook you can create sections. You can click on a different tab to go to that section and you can quickly add a new section by clicking on the far right tab with the plus sign and naming the new section.
- Page list. Within a section you can create pages. The pages panel lists the pages within the section and you can easily add a new page by clicking Add Page.
- Page. This area displays the content of the current page.
When you are on a page in a notebook, you can click anywhere and start typing. The area you are typing is called a note container (similar to a textbox). You can use the Insert menu on the ribbon to insert images or tables or other items. You can drag objects (e.g. note containers, images, tables) anywhere on the page to rearrange them.
Similar to other Microsoft Office applications, you can use the options on the ribbon to format text.
OneNote saves everything you do automatically so you do not need to save any notes manually.
To share a notebook, select File>Share. On the Share screen you will see options to either email the notebook along with a message or get a sharing link. With either sharing method you can select whether the recipient can edit the notebook or view only.
PRACTICE QUESTION
Candela Citations
- Using OneNote. Authored by: Lumen Learning. License: CC BY: Attribution
